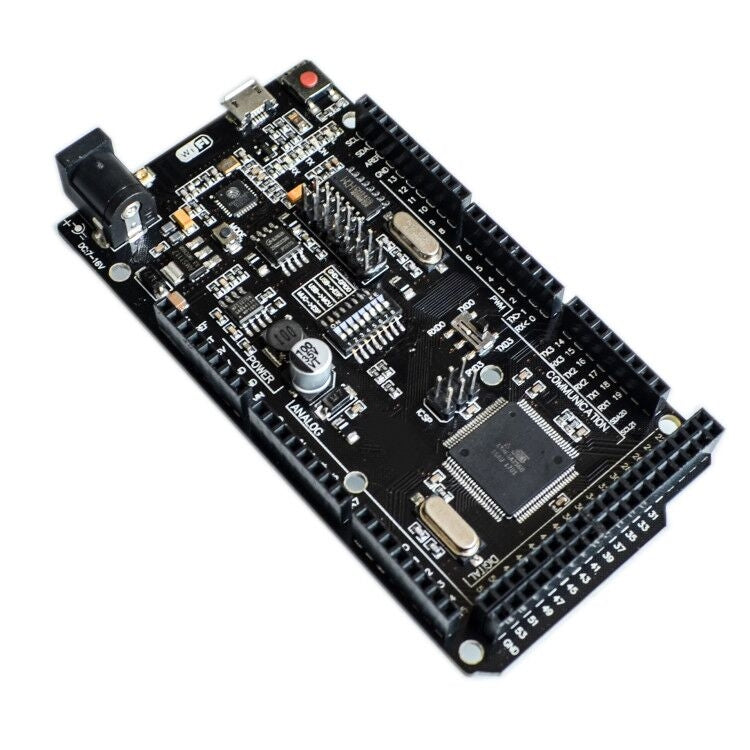
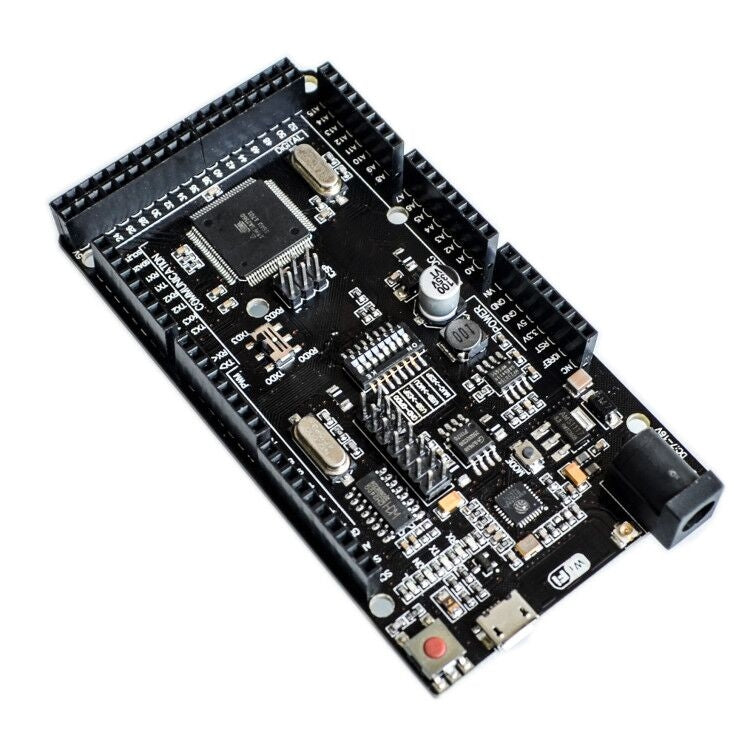
Mega-class I/O • Built-in WiFi • DIP-switch routing
Why this board (Benefits)
- Two MCUs, one board: Mega 2560 for heavy I/O + ESP8266 for WiFi networking/MQTT/HTTP.
- Cleaner wiring: No separate WiFi shield—fewer jumpers, fewer points of failure.
- Flexible workflow: Use ESP AT commands from the Mega or flash the ESP8266 directly.
- Classroom & prototyping-ready: Works with Windows/macOS/Linux and Arduino IDE.
What you can build
- WiFi-enabled robots/CNC with dashboard control.
- Smart home hubs (sensors → MQTT/HTTP → Home Assistant).
- IoT data loggers to Google Sheets / local servers.
- Teaching rigs for serial, networking, and embedded systems.
Starter bundles
- Jumper wires, breadboard, sensor kit
- 5–12V power supplies (use external power for motors/relays)
- USB cable for uploads and serial monitor
Technical specifications
| Main MCU | ATmega2560 (Arduino-compatible Mega-class) |
|---|---|
| Clock | 16 MHz |
| Flash / SRAM / EEPROM (Mega) | 256 KB / 8 KB / 4 KB |
| WiFi Module | ESP8266 (ESP-12 class), 802.11 b/g/n |
| ESP Flash | 4 MB typical (some lots 8 MB) |
| I/O (Mega) | 54× digital I/O (15 PWM), 16× analog, 4× UART |
| USB-Serial | CH340 or CP2102 (varies by lot) |
| USB Port | USB-B or Micro-USB (see product photos for the current lot) |
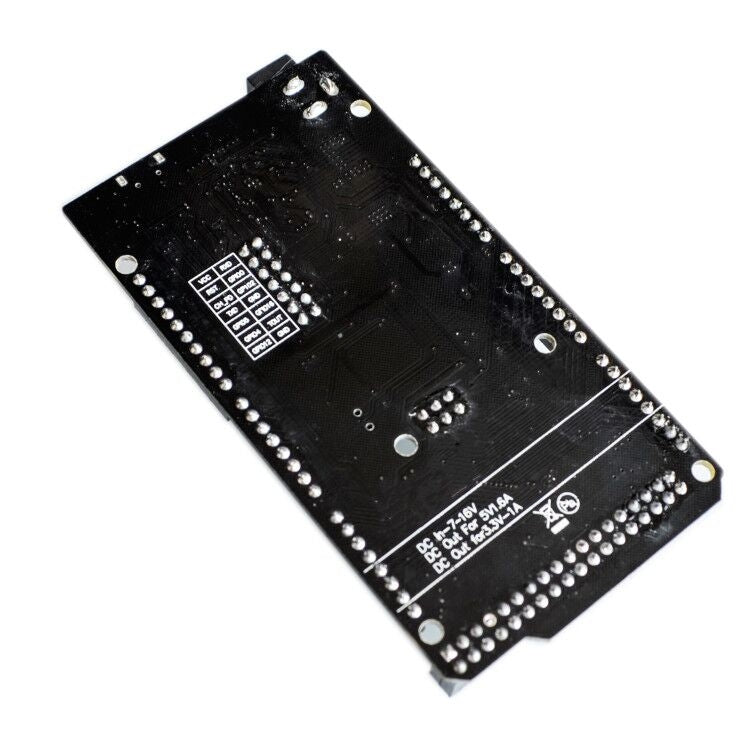
| Power (barrel jack) | 7–12 V DC, 2.1 mm center-positive |
| Board voltages | 5 V logic (Mega), 3.3 V logic (ESP8266 via onboard regulator) |
| Form factor | Mega-style footprint; Arduino-compatible headers |
| OS Support | Windows / macOS / Linux (USB driver may be required) |
Cosmetics (USB connector, USB-serial chip, ESP flash size) can vary by batch. Specs above reflect common configurations.
DIP-switch map (common 8-switch “RobotDyn-style” layout)
Your silkscreen may label the 8 switches as SW1–SW8. This map covers the most common routing patterns so you can get started fast. Always confirm with the silkscreen on your board.
| Mode | Purpose | Typical SW1–SW8 |
|---|---|---|
| USB → ATmega2560 | Upload sketch to Mega / Serial Monitor on Mega | ON, OFF, OFF, OFF, ON, OFF, OFF, ON |
| USB → ESP8266 | Flash ESP8266 / Serial Monitor on ESP | OFF, ON, OFF, OFF, OFF, ON, ON, OFF |
| Mega ↔ ESP bridge | Mega talks to ESP via UART (AT commands) | OFF, OFF, ON, ON, OFF, OFF, ON, ON |
| Normal run (dual) | Both MCUs run; USB attached to Mega by default | ON, OFF, ON, OFF, ON, OFF, ON, OFF |
Tip: If an upload fails, recheck the mode, select the correct board/port in the IDE, press RESET at upload start, or try a shorter/better USB cable.
Pinout & power notes
- Logic levels: Mega uses 5 V; ESP8266 is 3.3 V. Avoid feeding 5 V directly into ESP pins.
- Peripherals: Use a dedicated supply for motors/relays/LED strips. Keep USB power for logic and programming.
- Serial links: Many boards connect Mega↔ESP on a hardware UART; adjust your sketch/terminal baud accordingly.
What’s in the box
- 1× Mega + WiFi (ATmega2560 + ESP8266) Arduino-compatible board
FAQ
How do I choose which MCU to upload to?
Set the DIP switches to route the USB-serial to either the Mega or the ESP (see the map above), then pick the matching board in Arduino IDE and upload.
Can the Mega and ESP run at the same time?
Yes. They are independent MCUs. Exchange data via Serial for WiFi connectivity while the Mega handles sensors/actuators.
Do I need level shifting?
The onboard design handles Mega↔ESP. For external connections to the ESP8266 pins, keep signals at 3.3 V or use a level shifter.
Which libraries can I use for WiFi?
Use AT commands from the Mega or flash the ESP8266 with the Arduino core and use ESP8266WiFi, PubSubClient (MQTT), and HTTP clients.
Explore more: Arduino Collection • WiFi & IoT • Displays • Motor Drivers
📦 Fast shipping within the Philippines. Same-day processing on in-stock orders before cutoff.
Mega WiFi R3 ATmega2560 with ESP8266 USB-TTL Arduino Compatible
Mega WiFi R3 ATmega2560 with ESP8266 USB-TTL Arduino Compatible
Low stock: 3 left
Product Code
SKU:2842
Couldn't load pickup availability